Frequently Asked Questions
Step-by-step guides for question banks, classes, and assignments. Pick a topic to narrow the list.
A question bank is a collection of questions that are used to create an assignment. Basically, it works like this: you create a question bank and add any number of questions to it. Let’s say, 50 questions. But you don’t want your students to answer all these questions, so you set the assignment up in a way so that JumblED picks, say, 10 questions at random from this question bank. This means every student will get a different set of 10 questions for the assignment. This minimizes the chance that students can share answers to questions with each other. It also allows students to retake assignments without getting the same questions over and over again.
Using a question bank to create an assignments helps prevent students from sharing answers since no two students will get the same set of questions. Furthermore, it also allows students to retake assignments without getting the same questions over and over again.
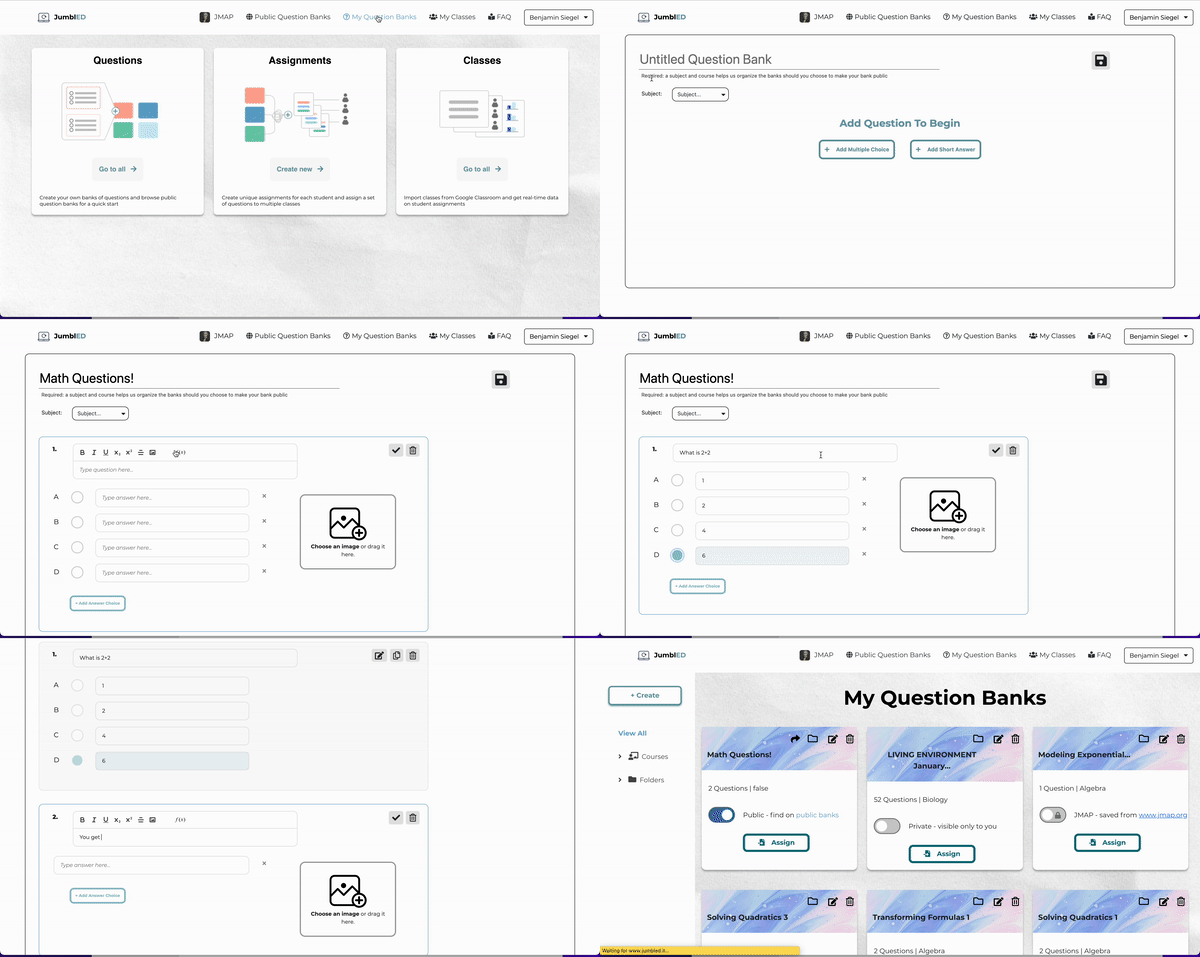
Go to the My Question Banks tab and on the top left corner click "Create." Choose the option "Question Bank" to create a new question bank. You can add either multiple choice or short answer questions to your question bank. Click the save icon on the top right corner when you are done adding questions. Viola! You've created a question bank!
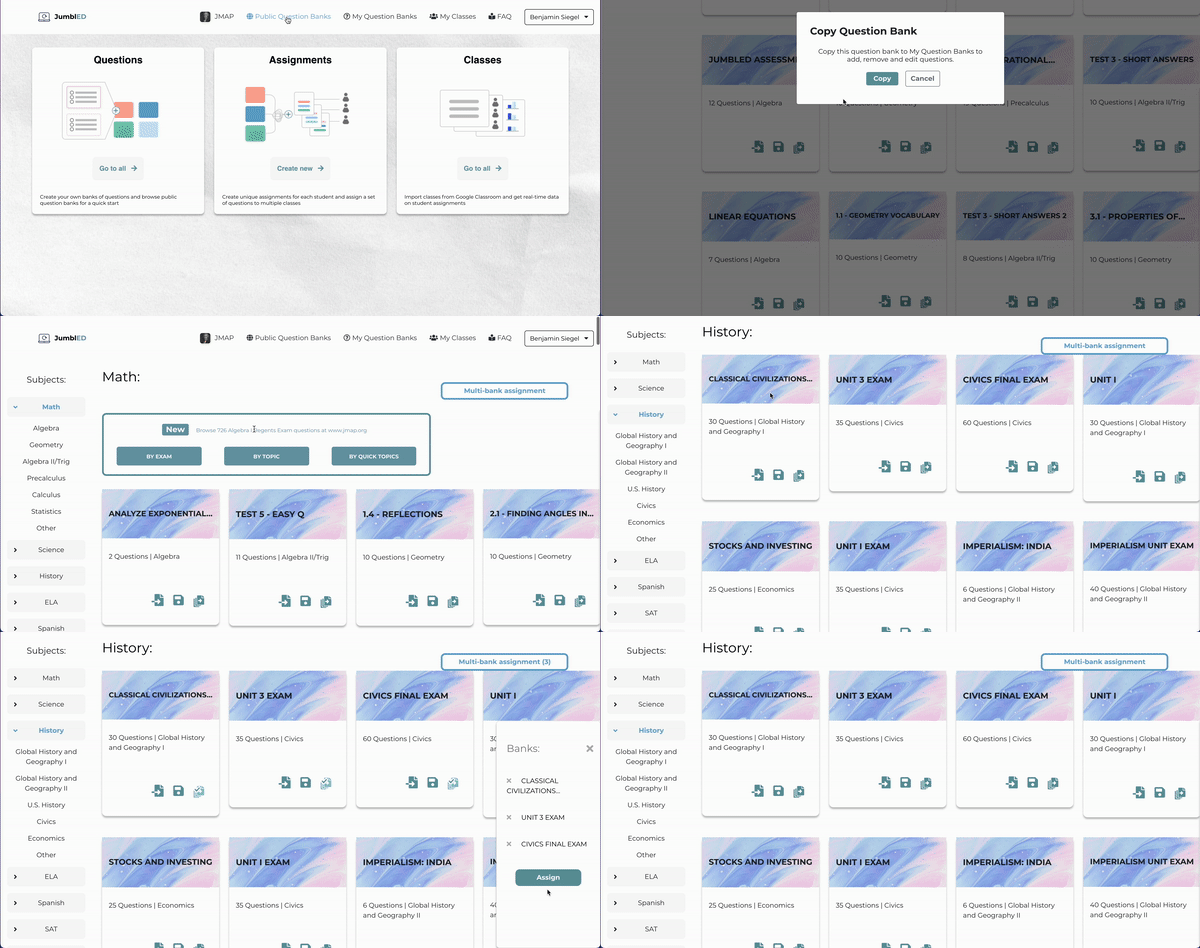
Public question banks are question banks created by other JumblED users or question banks created using New York State Regents examinations (we plan on uploading all Science and Math NYS regents by the end of the 2021-2022 school year). You can either assign these question banks directly to your students or make a copy so you may edit, delete, or add questions to the bank.
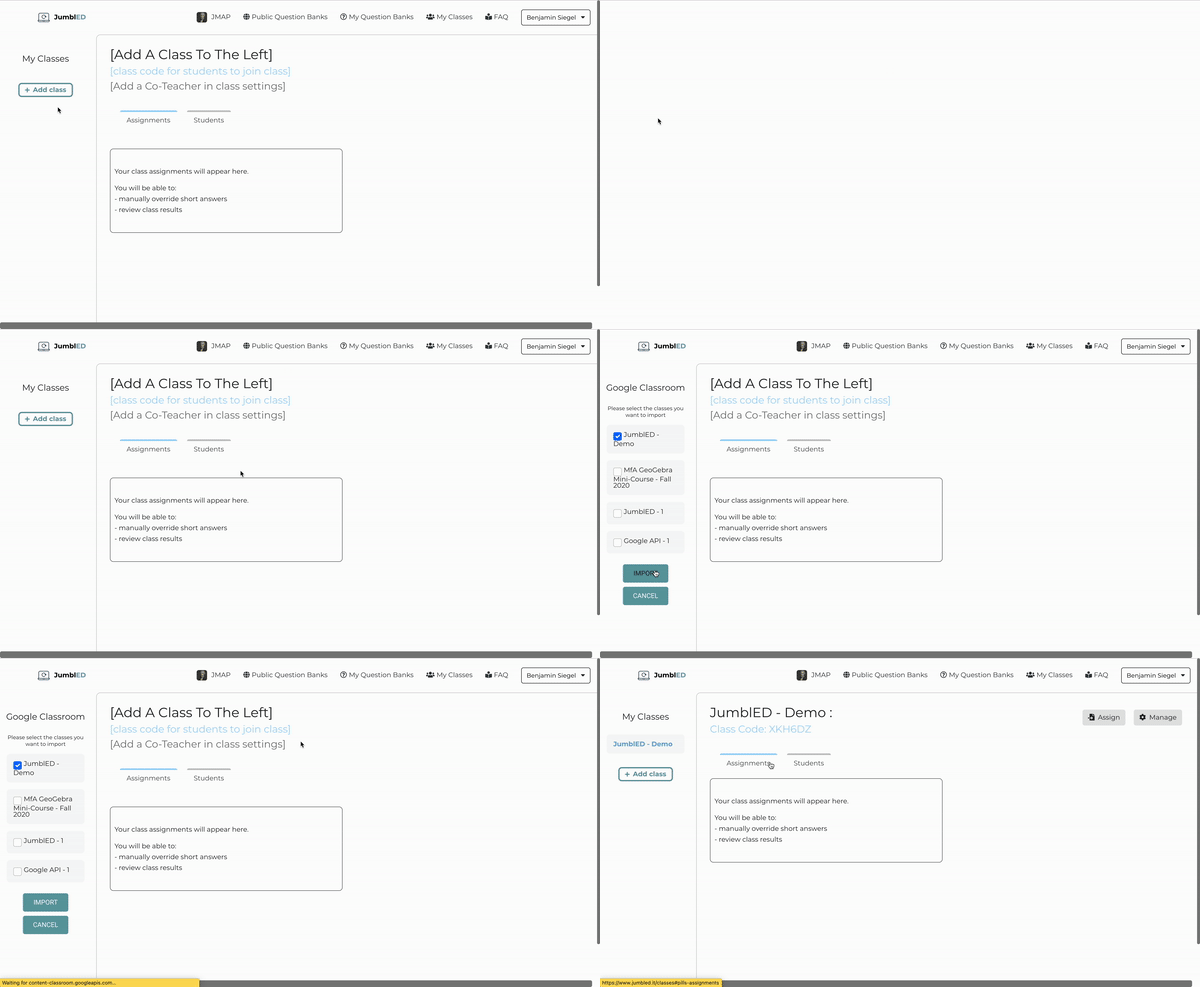
Click "Add Class" and then click "Google Classroom." After you login to your Google account, you can select which classes you want to import!
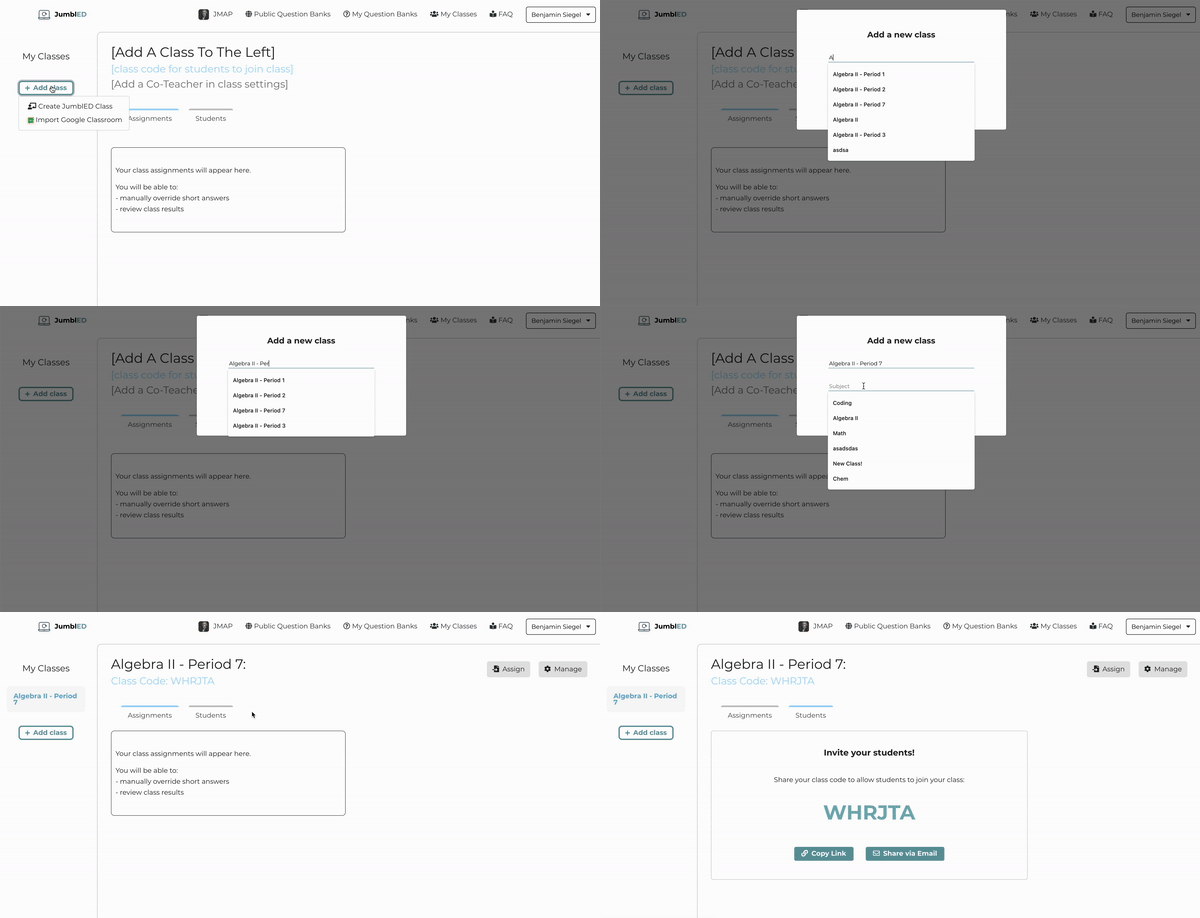
Click "Add Class" and then click "Create JumblED Class." Add the name of the class and subject then click "create class." The next step is to have student join the class using the class code.
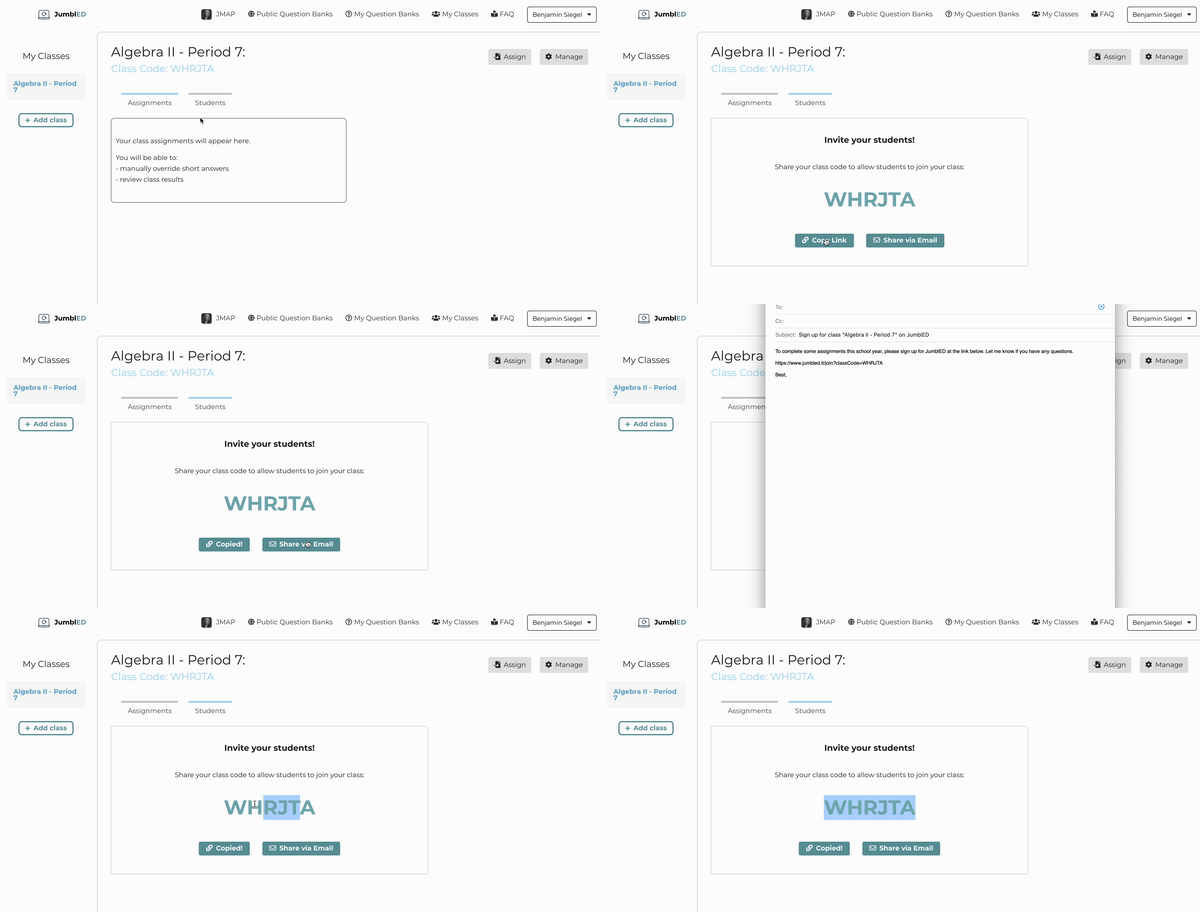
After you've setup your class, students can join your class using the class code provided to you. You can either provide students with the class code to enter themselves or generate a link for them to join the class.
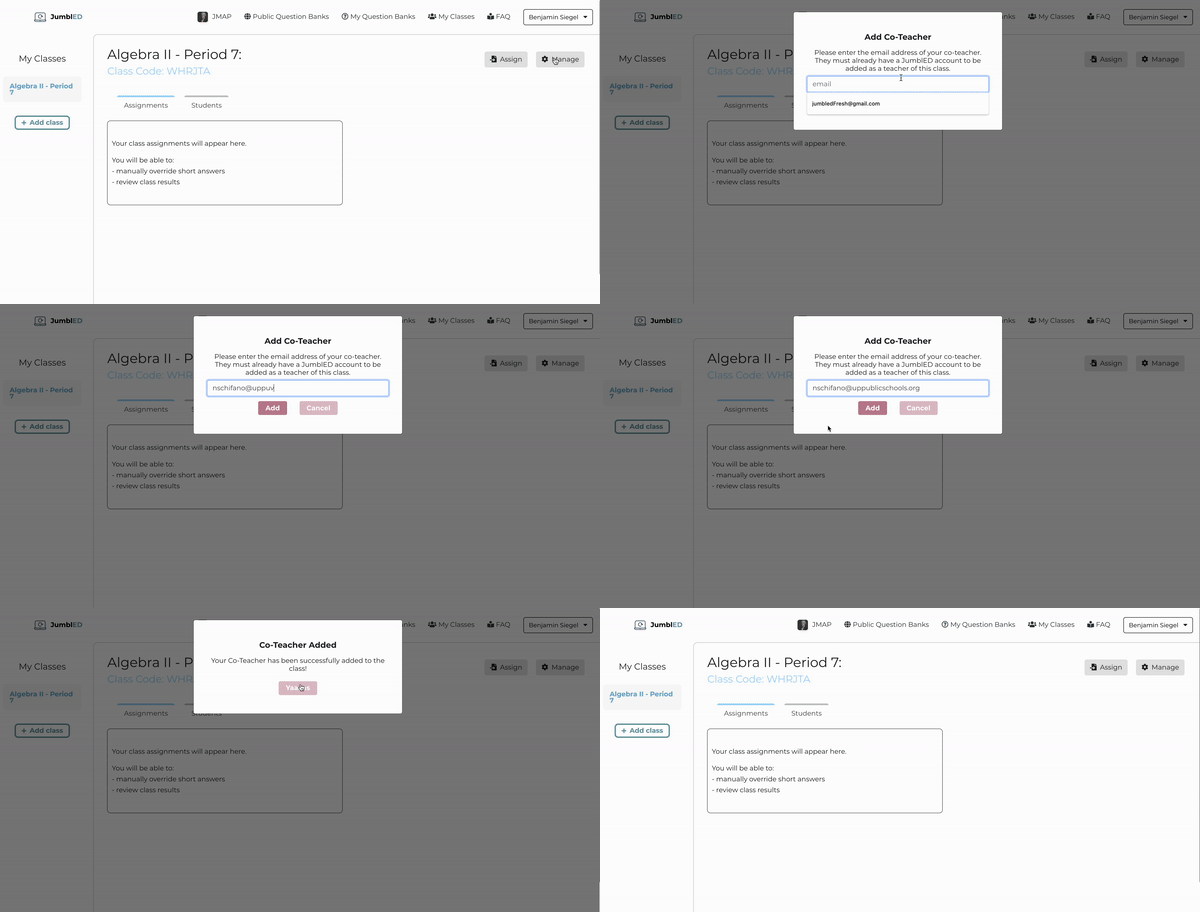
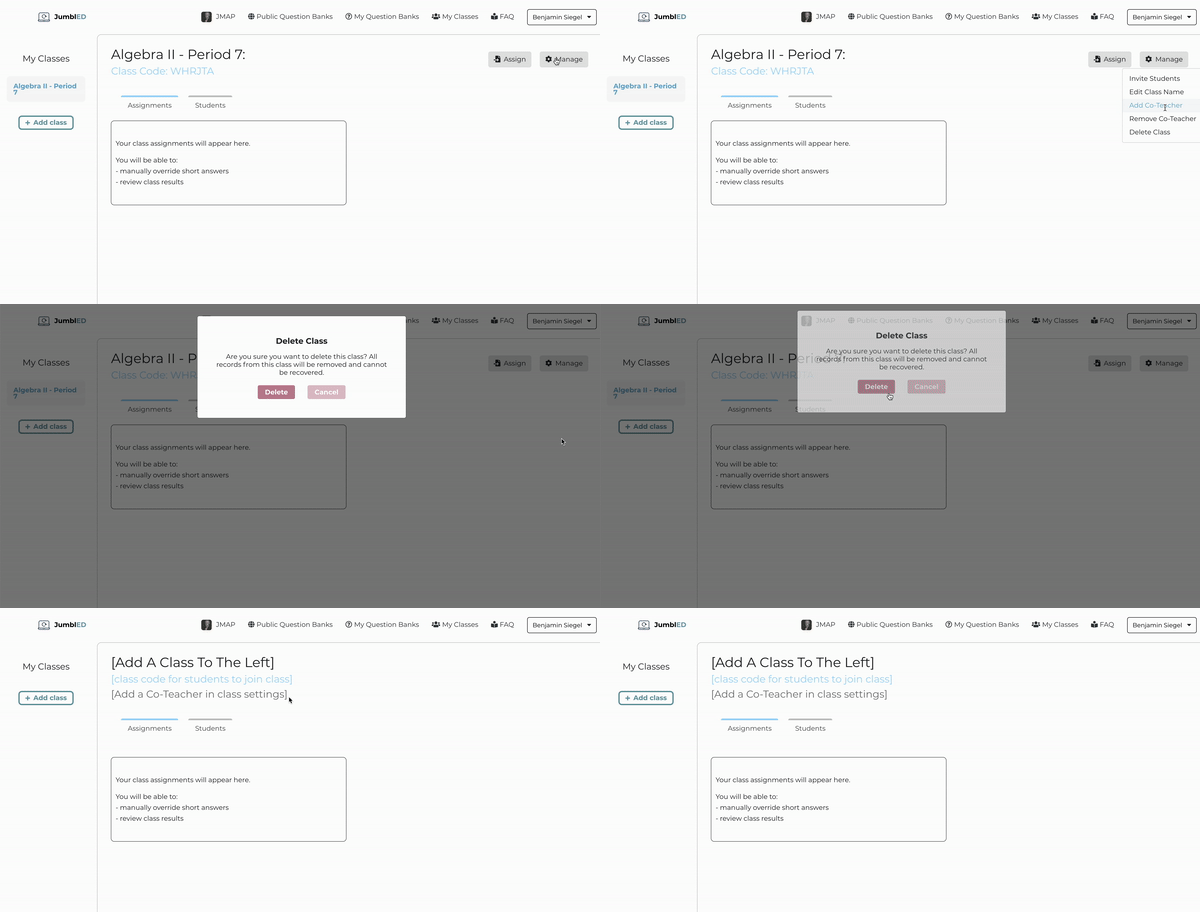
Click the settings button in the class that you want to add a coteacher to. You will see an option to add a coteacher there. Coteachers will be able to access your class data - the students in your class and their grades on assignments. They will not be able to create new assignments for the class or access your question banks.
Go to the class you want to delete and press the settings button. You will see the option to delete your class in the dropdown menu. Once you delete a class, you will not be able to recover the data from this class. It's gone...FOREVER.
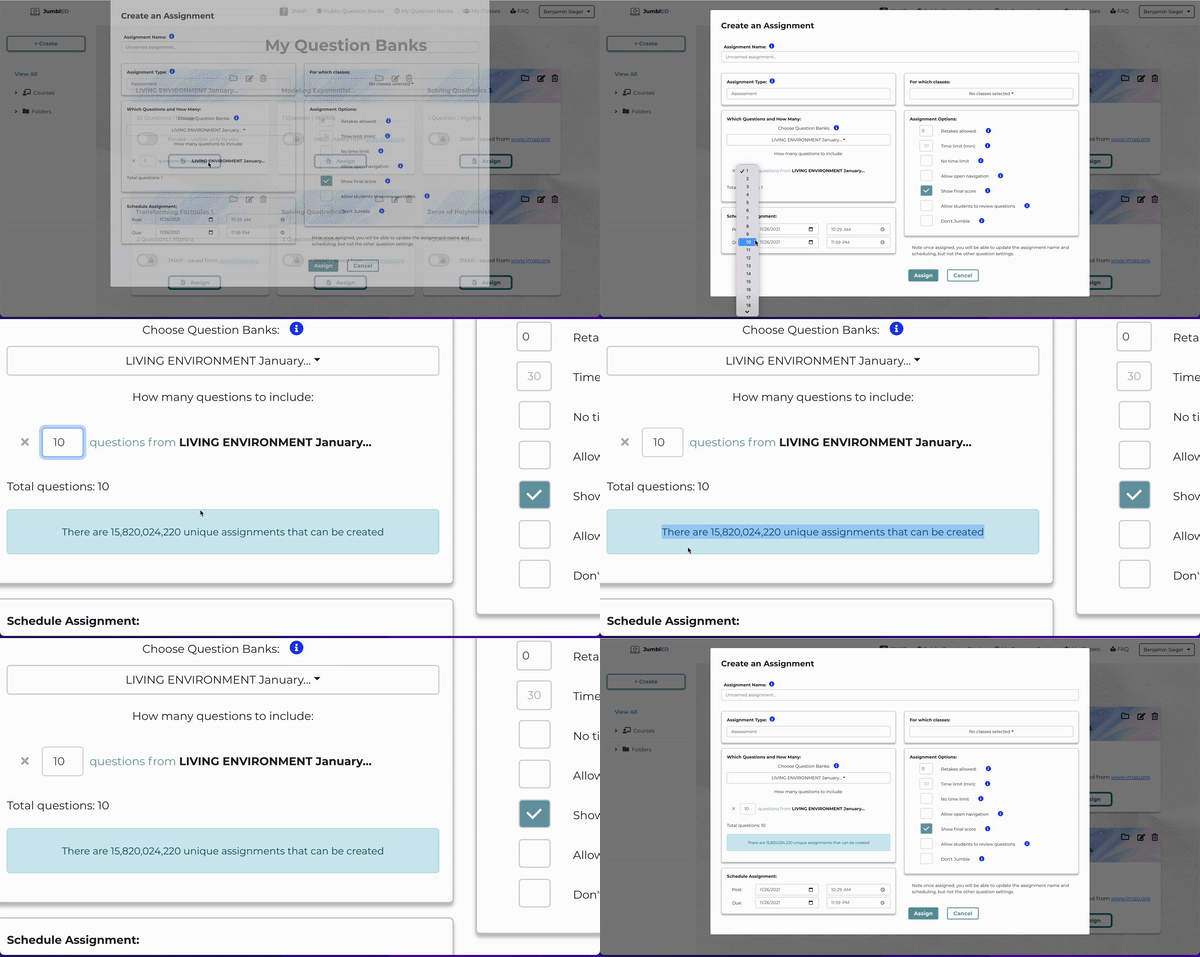
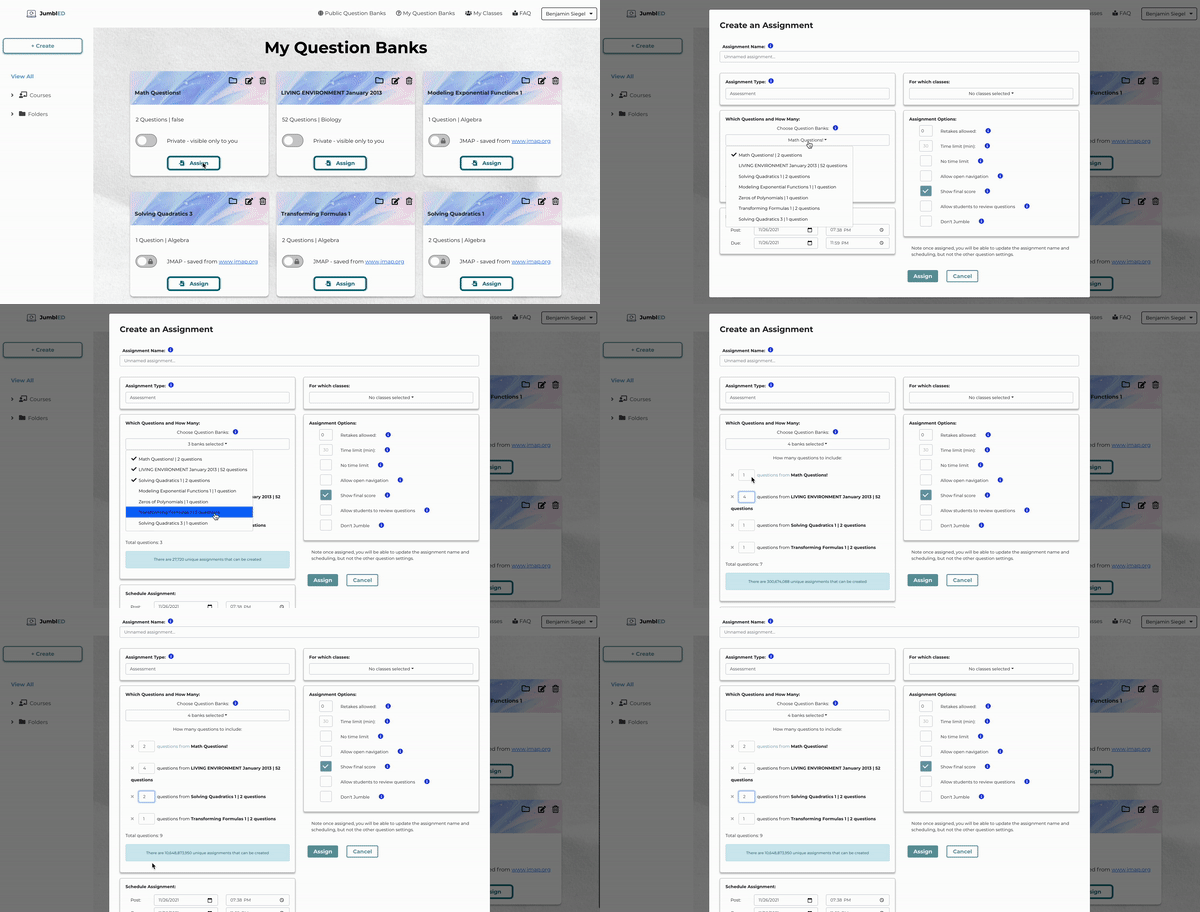
To create an assignment, click the "My Question Banks" tab and click the "assign" button on the bank you want to assign questions from. You can choose how many questions each student will receive, how much time they have to complete the assignment, how many times they can re-take the assignment, set if they can see the results immediately after completing the assignment, and set whether to jumble (randomize) the questions or not.
JumblED allows you to create an assignment using multiple question banks. Perhaps you want to make sure every student recieves the same number of "Easy," "Medium" and "Hard" questions on an assignment. You can set up three different banks where the questions are grouped by difficulty. Then choose how many question from each bank should appear on the assignment.
To create an assignment using multiple banks, just select the banks you want to include questions from in the "Choose Question Banks" dropdown. Then, select how many questions from each bank you want to include in the assignment.
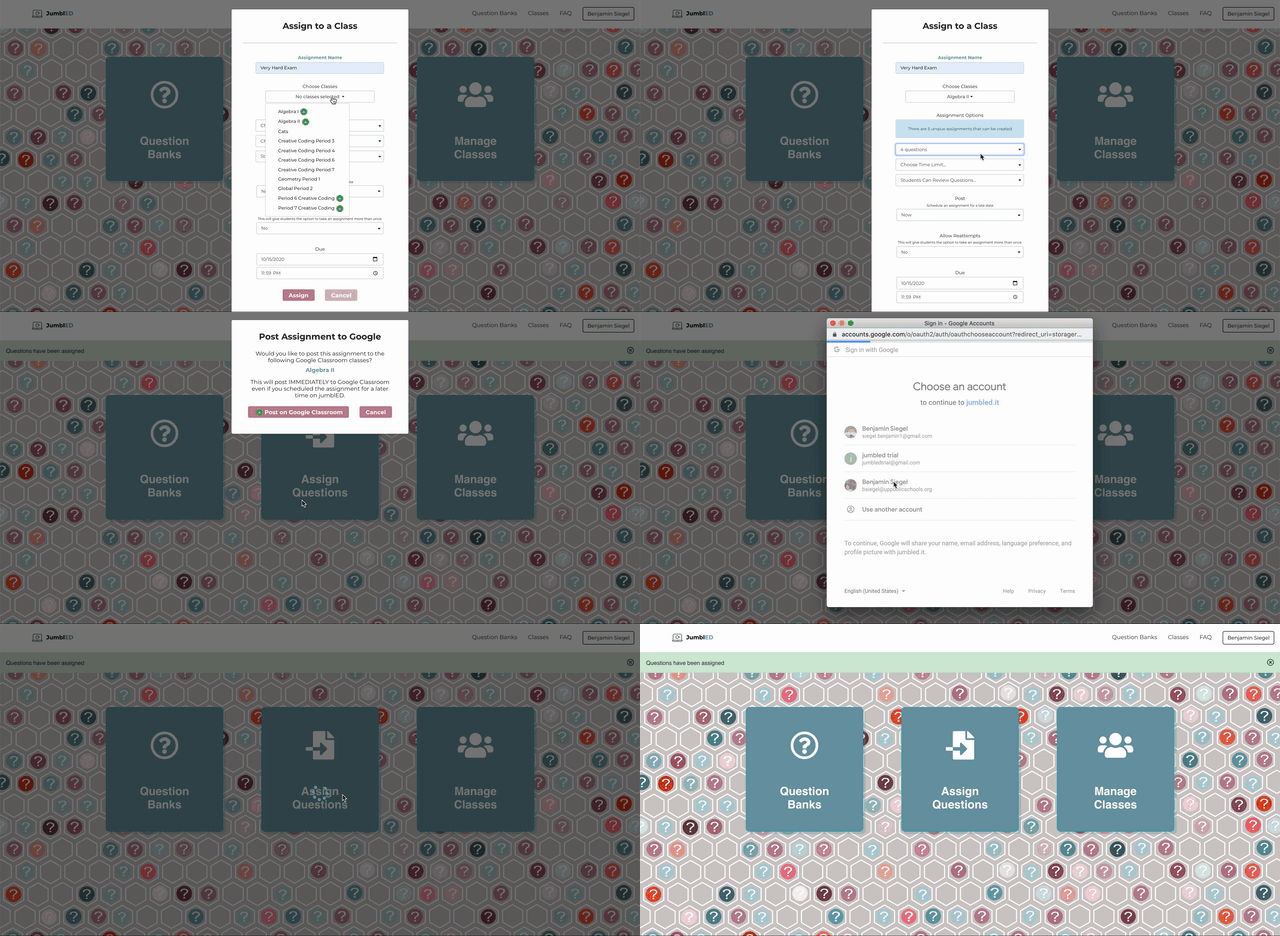
If you assign a quiz or exam to a class that you imported from Google Classroom, you will automatically be prompted to post it on Google Classroom. Just choose "Post To Google Classroom" and a link to the quiz or exam will be posted in your Google Classroom feed.
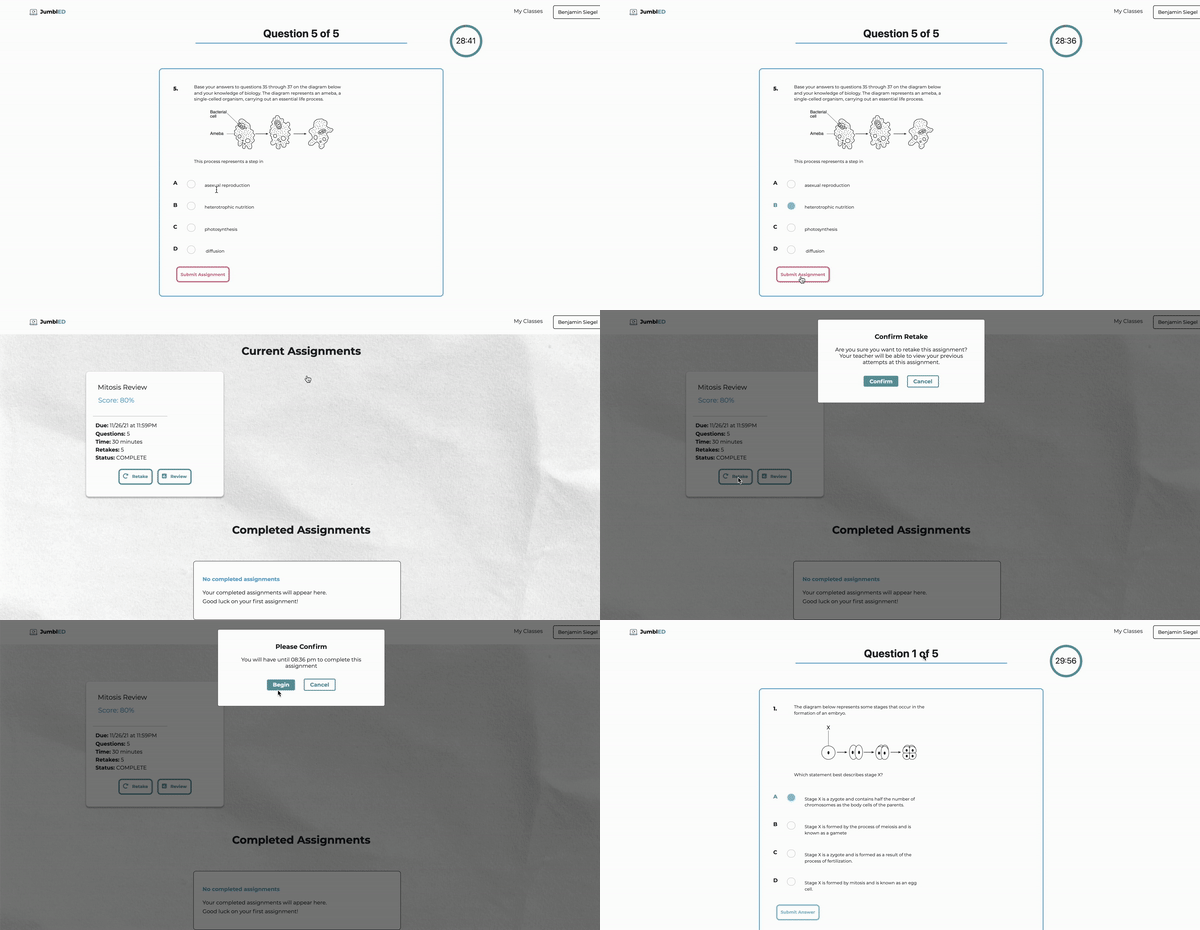
To allow your students to attempt an assignment multiple times, just set the number of retakes to a number great than 0 when creating the assig. If a student chooses to retake the assignment, you will be able to view their previous results. Unless you choose the option "Don't Jumble," students will get a new set of questions each time they retake the assignment.
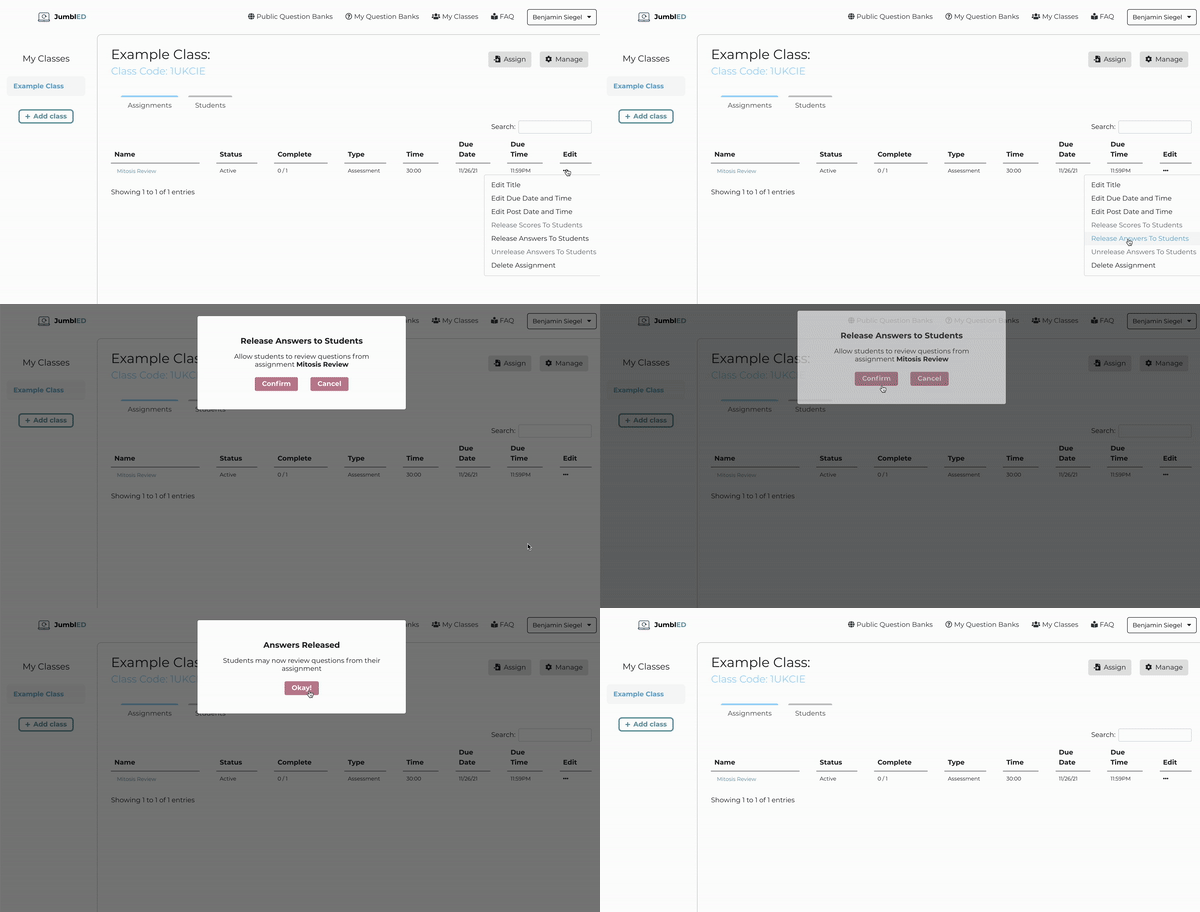
You can do this in one of two ways. The first is to select "Allow students to review questions" when creating the assignment. This will allow students to review the questions they got right and wrong immediately upon completing the assignment. The second is to manually release the results of the assignment at a later date. Just go to the "classes" tab, then click "edit" on the assignment you want to release the questions for.
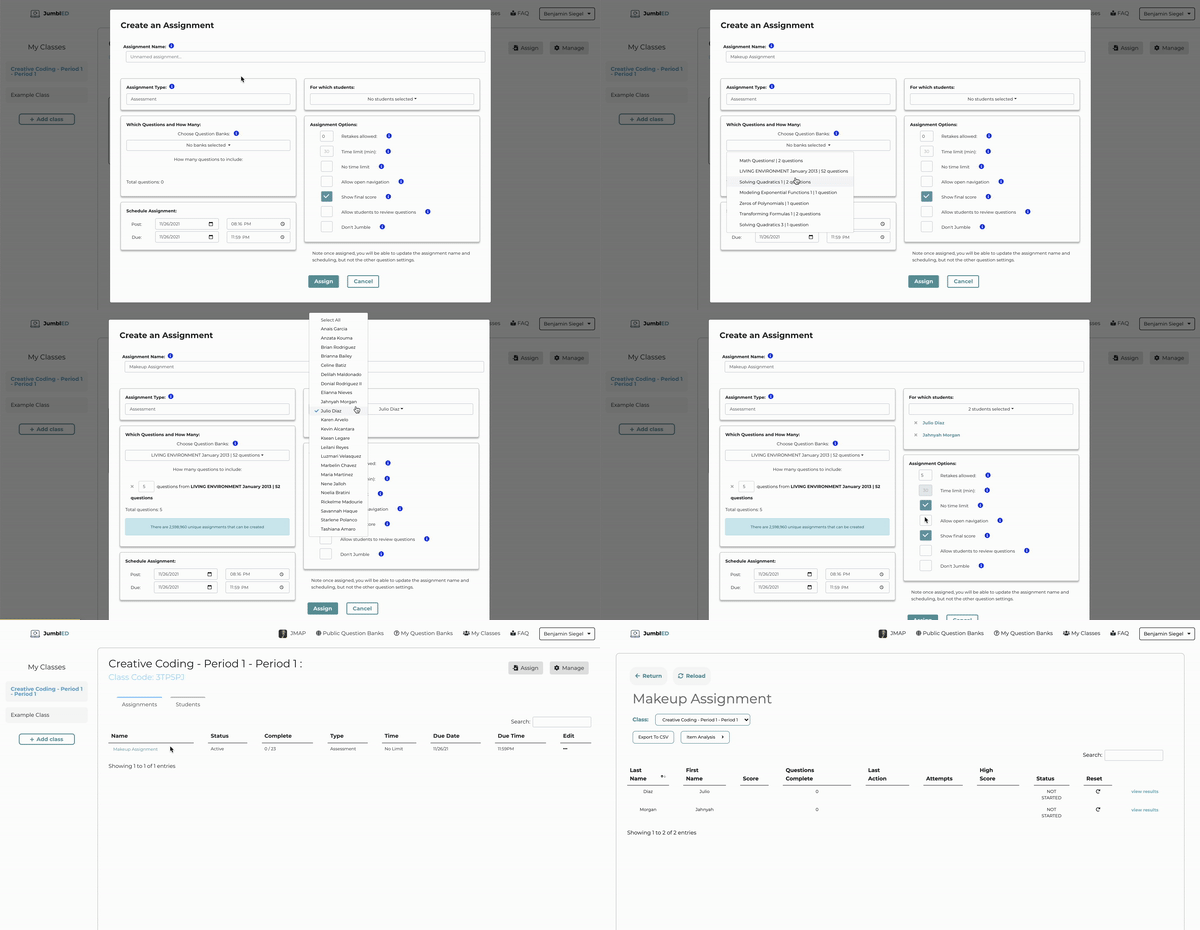
To assign questions to individual students (rather than the entire class), go to the Classes tab. Then, on the top right corner, click the "assign" button. You can choose individual students from the students dropdown list to create the assignment for. Only the students you chose will see the assignment you created.
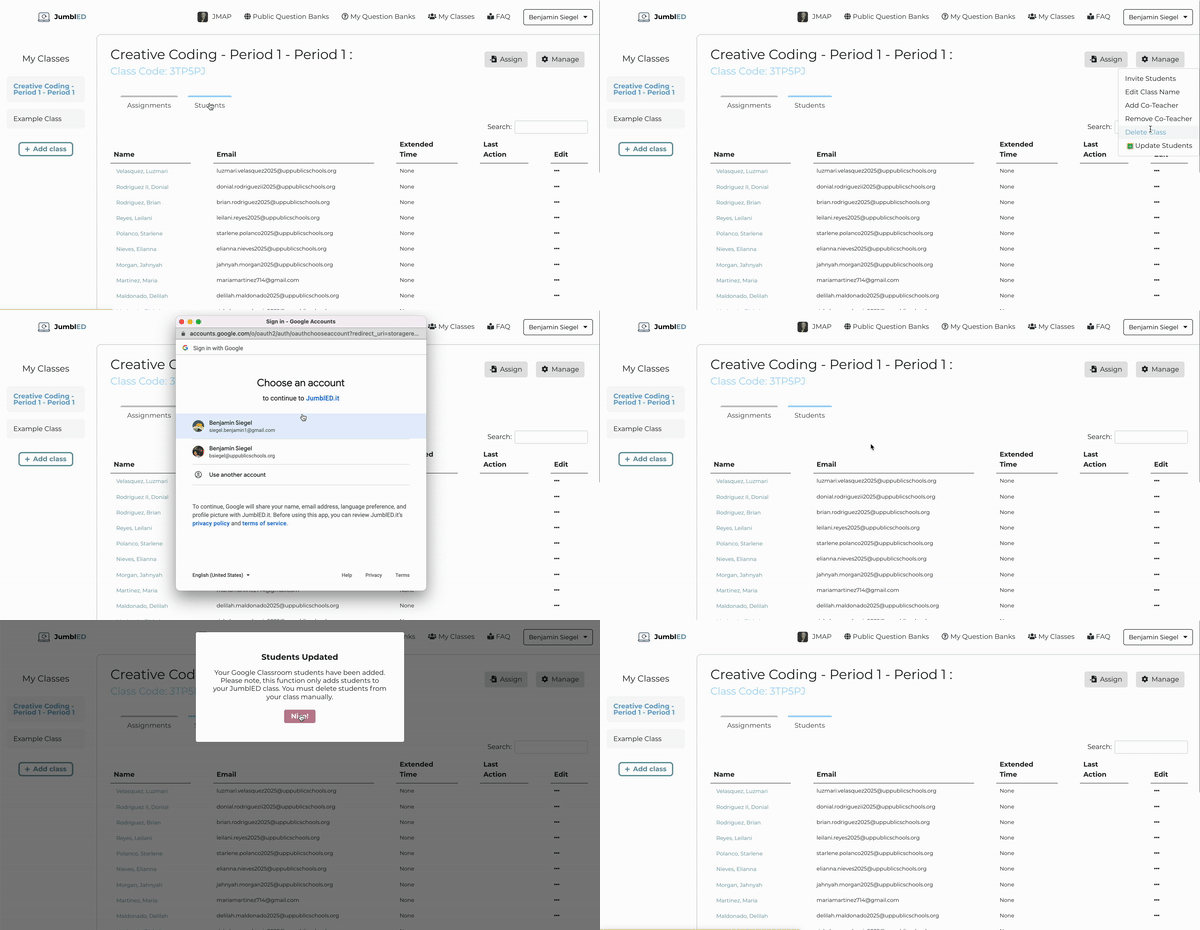
Go to "classes" and then click the "manage" button in the top right corner. Click "update students" to import any new students that have been added to your Google Classroom. Note: This DOES NOT remove students who have left your Google Classroom. This must be done individually by clicking the "students" tab. You will see "delete student" in the edit dropdown.
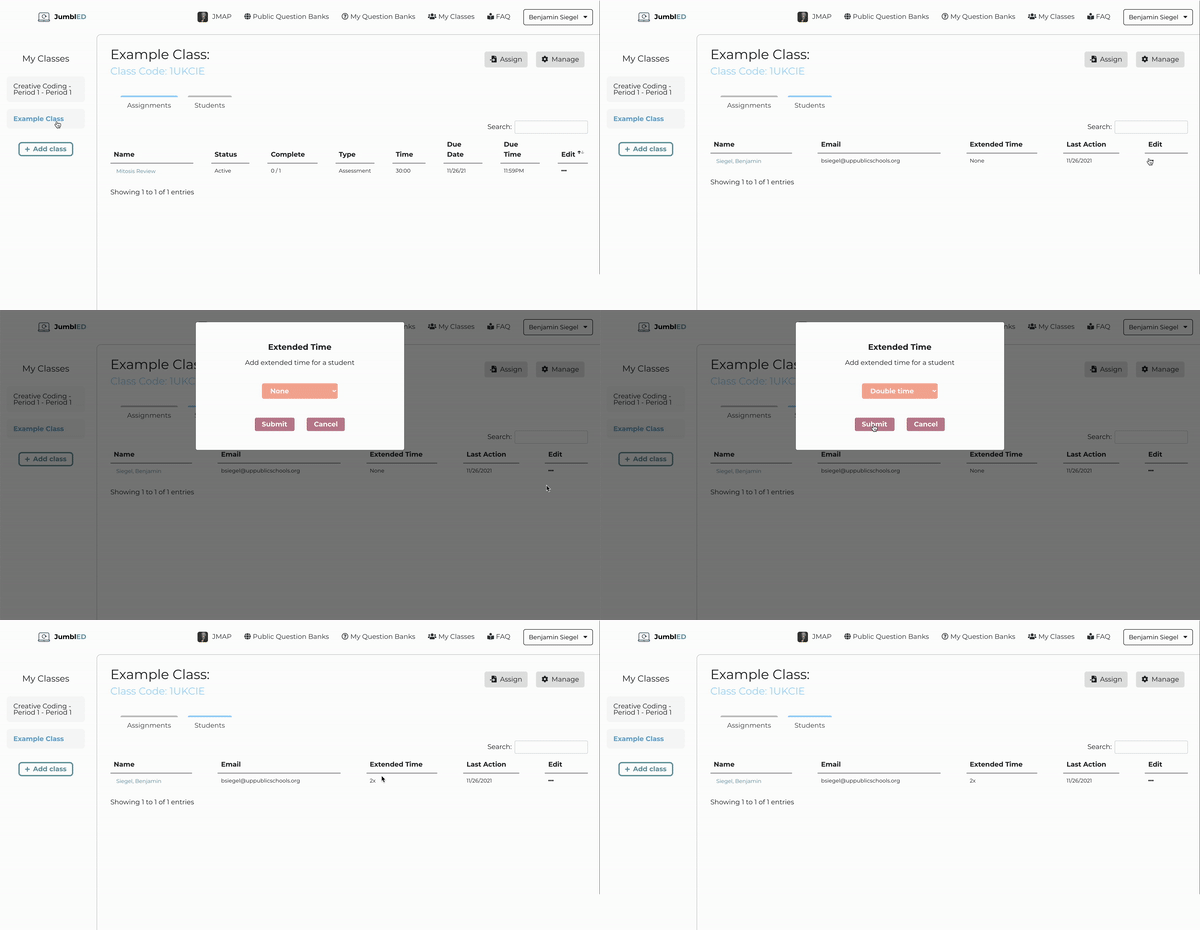
Go to "classes" and then click the "students" tab. If you click three dots in the edit column, you will see an option to "edit extended time." This will automatically provide that student with extended time on all current and upcoming assignments going forward.
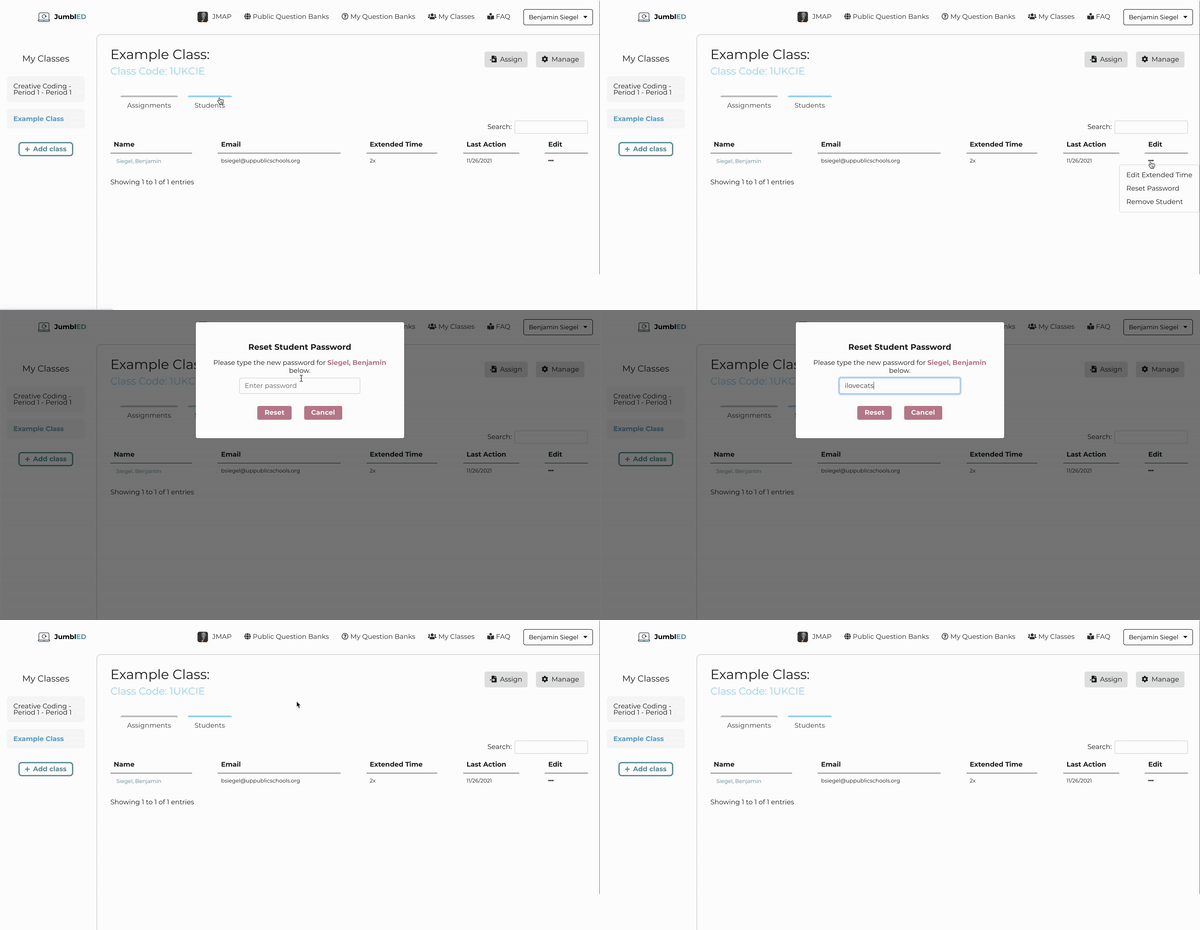
Students can either reset their passwords themselves or you can reset it for them. Go to "classes" and then click the "students" tab. If you click the edit icon, you will be able to reset the students password manually.
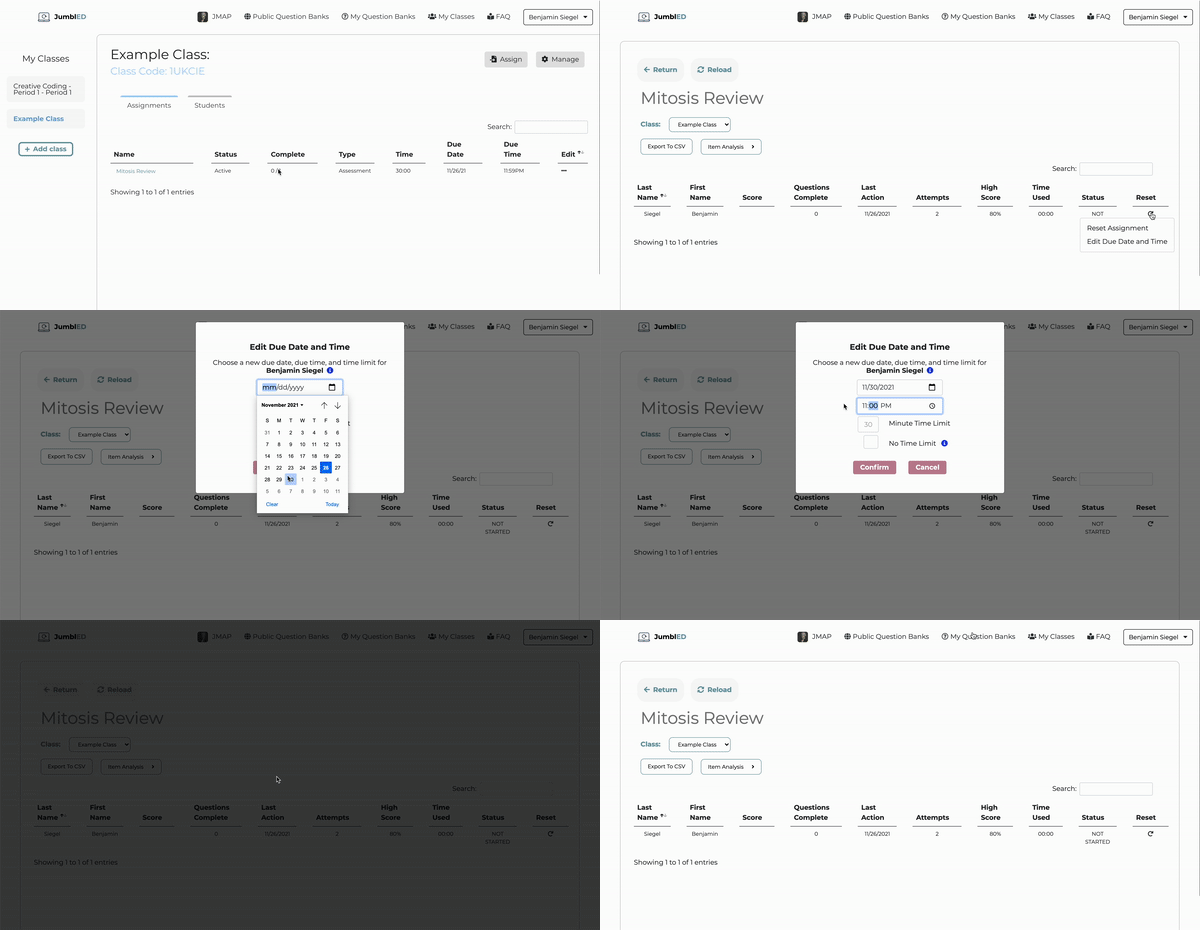
Sometimes students are absent or need more time on an assignment. You can always edit the due date and add time to the assignment for an individual student. Just go to "classes" and click the "assignments" tab. Click the title of the assignment. In the reset column you will see the option to edit the due date and time. By editing the due date and adding time for that individual student, they will be able to open the assignment even if it is past the original due date.
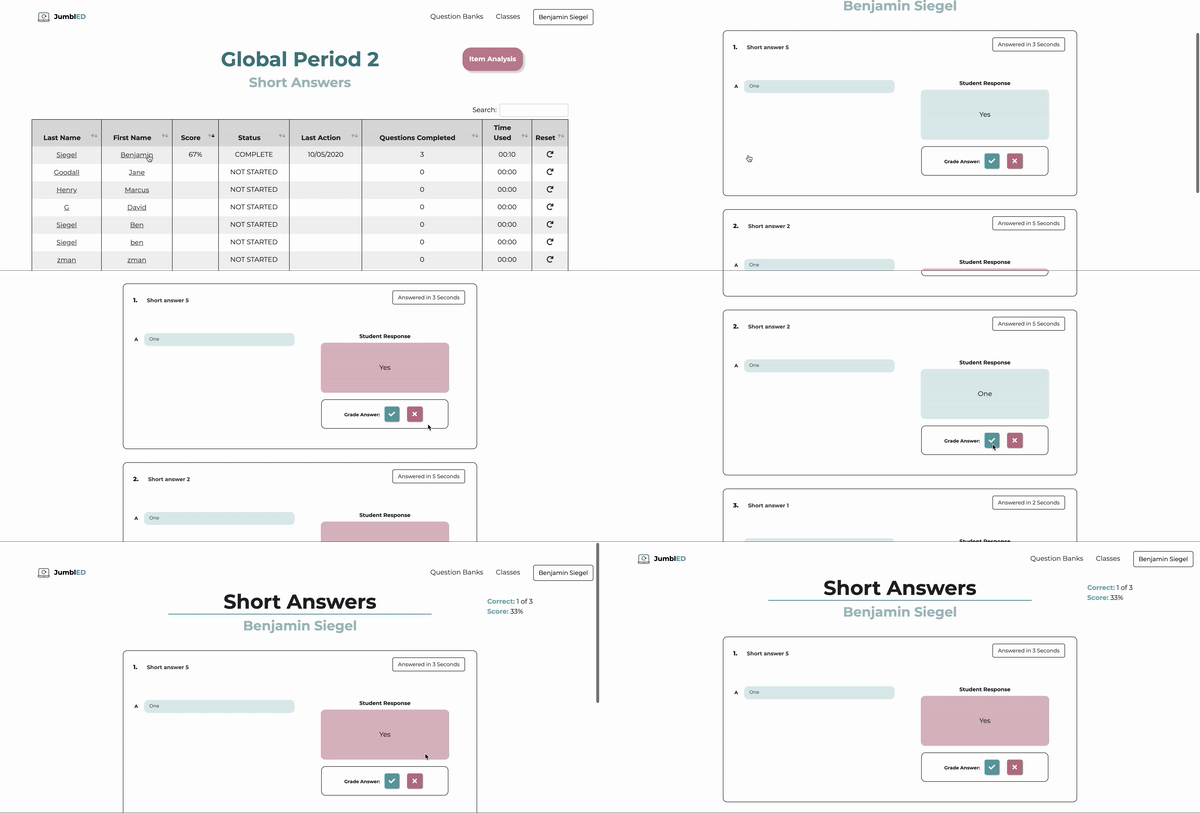
Click the assignment you want to grade on the "classes" page. Then click the name of the student you want to manually grade. All Short Answer problems have the option of being regraded manually.
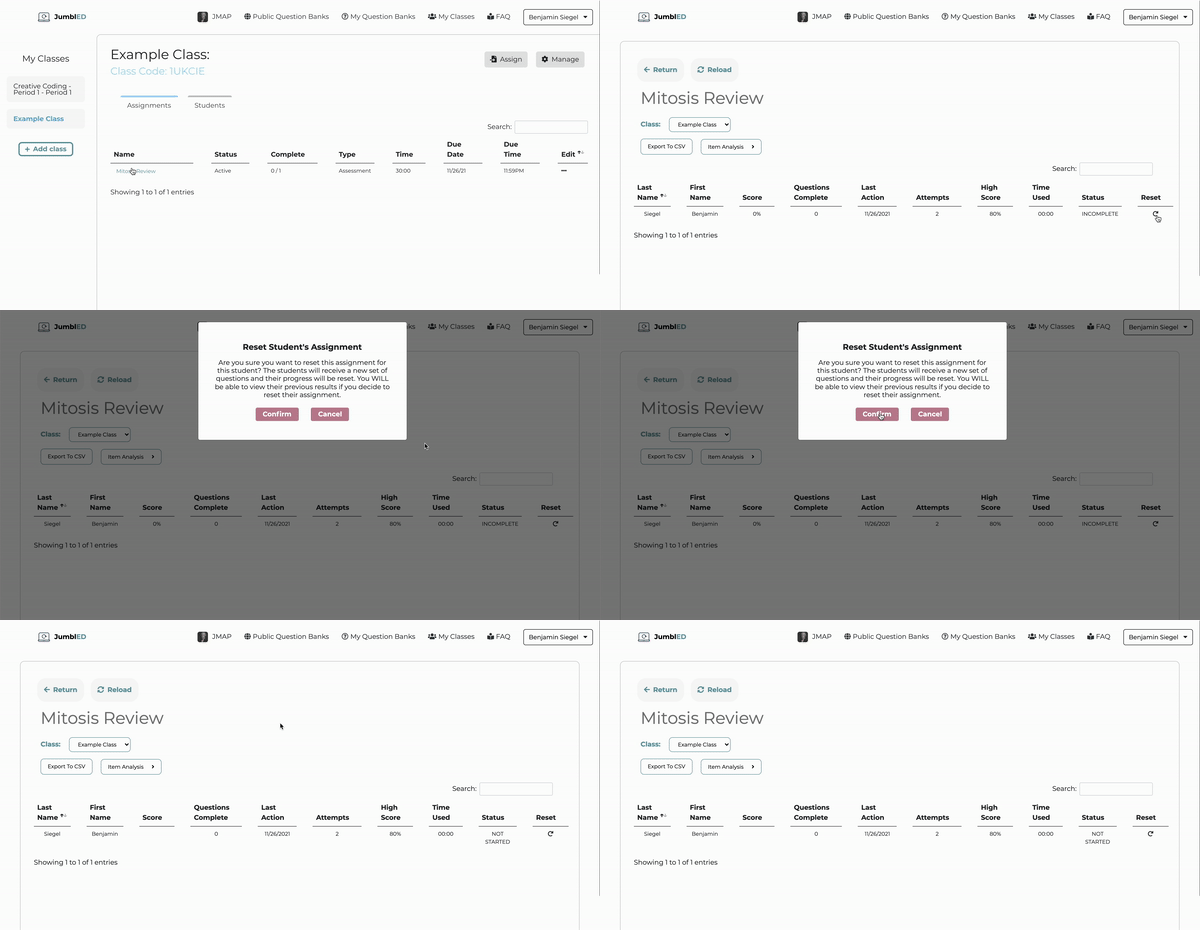
Go to classes and click the "assignments" or "students" tab. Choose either the assignment or the student you want to reset the assignment for. Then, click the "reset" button on the last column of the table and choose "reset assignment". This will generate a new set of questions for the student. You will still be able to view thier previous results.